I know a lot of my web dev peers will so their work in photoshop, but I’ve never found photoshop to be as powerful for web development as Illustrator. For starters, apart from adjustment layers and layer effects most photoshop work is destructive. That is, you alter pixels permanently on the canvas. Illustrator is vector based so you can always grab a shape’s handles to move it about and resize. Also every object has a width, height, X-axis and Y-axis so object placement and centring can be mathematically precise! That might sound anal, but design is about balance and many designers work within a grid, or at least use equidistant margins and spacial elements.
So, thats just a few reasons. Anyone who knows illustrator knows it’s ridiculously feature rich for creating graphics so the pen, vectors and shapes are ideal for constructing web spaces. With a few tricks you can make Illustrator “pixel perfect” too so it doesn’t have blurry, antialiased lines.
Here are some of my methods for using Illustrator for pixel-perfect web designs :
1. Create a new document. I use about 1200px wide so I can see a bit of space + background around a smaller fixed-width design. Hit Advanced and set the PPI to 72 (screen resolution). You can always change the art board size later but this is a good start. Make sure the units are set to “pixels”

2. In the Transform Window, make sure the “align to pixel gird” tick box is not ticked. This will make sure your vectors don’t ever sit on a half pixel.. e.g. 599.5 on the X-axis. If you ensure your lines and edges are always on whole pixels they will be sharp as a tack when you export the slices.

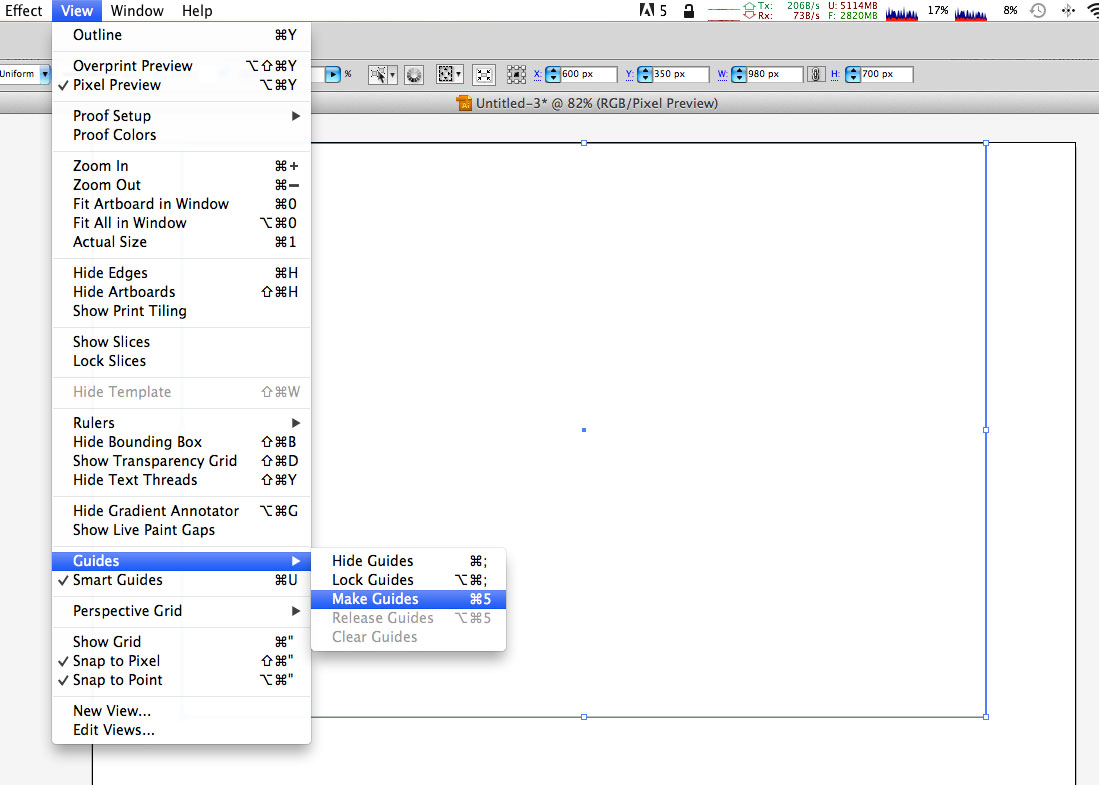
3. I also like to start with a 980 x 700 guide. Create a rectangle with these dimensions and set it’s X axis to 600 (half the size of your document width) and the Y-axis to 350 (half the height of the rectangle. That will centre it horizontally and vertically. Then “Make Guide”. I like to lock the guide layer so I can’t select it either.
(Note – I often pick 980px as my main wrapper div width when I start coding as well, this means the edges of the screen will fit nicely on an iPad without having to do any extra work. It also fits nicely with some small margins on a 1024px wide screen. Over time these values will increase with average screen size, but the now they work great.)
4. Start designing your site. Use shapes, effects, vectors, 3d objects, place graphics and even link PSD files for photo elements (you can update and save them in Photoshop and the changes show up in your Illustrator work). If you use drop shadows or outer glow make sure you leave enough room on the sides for them to show up in your final slices.
For any element you want perfectly centred set its X axis value to 600 (or half your document width).
(TIP – Create a new layer for your background.. you can export this separately, then turn the layer off and use transparent PNGs for your slices if you have nice shadows on your main content slices. )

4. Use the slice tool to start cutting up the header, body etc as you like. Check the X / Y axis and width to make sure all your slices line up nicely. Go to the Slice Options … option in the Object menu to name your slices. (.png or .jpg will be appended to the name you choose, when you export them).

5. Once you have created all your slices, Go to File -> Save for Web & Devices. You can select individual slices here and set them to JPG or PNG as required and set compression levels too. Hit Save again and pick a folder to save them in. It will create a folder called “images” wherever you choose.
At this point you can start coding your HTML / CSS. I typically set the slices as background urls on containing DIVs and because illustrator has all the widths / height clearly defined it’s easy to bang out the stylesheet.
That’s the quick version of course. Once you get a good working document you’ll have dozens of slices and layers which you can modify and export to your hearts content. I always try to keep all the site’s elements in one document and use the blank / transparent space at the end of the art board for buttons / banners and other minor elements.
Here is a screenshot of this website’s working Illustrator file.. you can see all the elements nicely separated. I use repeating horizontal and vertical backgrounds for the main background, header and content areas.

Hope this helps stoke the fires of creativity .. considered ditching Photoshop and giving Illustrator a go for your next web design project!